How to Enable CloudFlare CDN on Your ProperHost Account
In this tutorial I will show you how easy it is to set up your own CDN service using the CloudFlare service that is provided for free with all ProperHost hosting packages. CloudFlare offers a number of benefits to website owners, but one of the best features is a fully distributed, global CDN (content delivery network) service.
Why use a CDN?
CloudFlare's global CDN uses a technology called Anycast to distribute your static content across 23 data centers spread across the globe to ensure it is always close to your visitors. The result is that your website, on average, loads twice as fast for your visitors regardless of where they are located. In addition you will potentially save large amounts of bandwidth as your static files (images, CSS & Javascript files, etc.) are now downloaded through CloudFlare's network, and do not count towards your server bandwidth. This means huge savings for a high-traffic website.
Create a CloudFlare CDN on your account
As ProperHost is a CloudFlare hosting partner, the CloudFlare service is fully integrated in our cPanel hosting control panel. It can be enabled with the click of a button. Once CloudFlare is enabled you will be able to view various stats directly from cPanel, such as how much bandwidth has been saved and more.
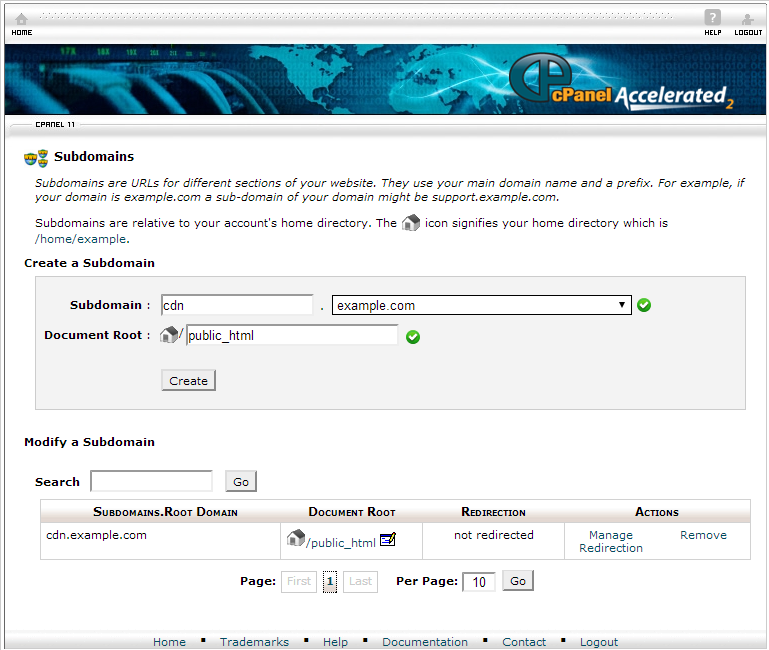
CloudFlare is turned on/off per subdomain, so we recommend creating a new subdomain for the CDN. Let's call it cdn.example.com. In this example we have pointed the subdomain to the location of your main domain for simplicity, but you may put your static content in a separate directory if you want.
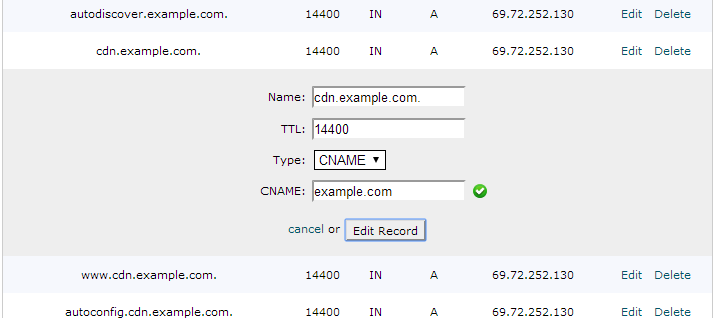
There is one little change we need to make in order to enable CloudFlare CDN for the subdomain. Open the Advanced DNS Zone Editor from the cPanel main menu, and then change the type of the newly created cdn.example.com entry from an A record to a CNAME record as shown below.
Click on Edit next to the cdn.example.com entry, and then change Type to "CNAME" and enter your domain name for the record (example.com). Click Edit Record to save the changes.
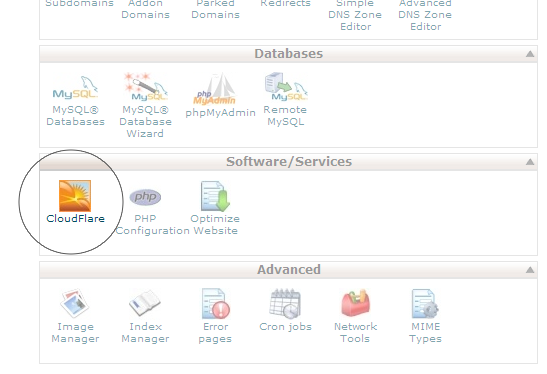
We are now ready to enable CloudFlare for the new subdomain. On the cPanel main menu, click on the CloudFlare icon.
Next you must type in your email address to sign up for your free CloudFlare account. Everything is integrated so you don't have to leave the cPanel during this process.
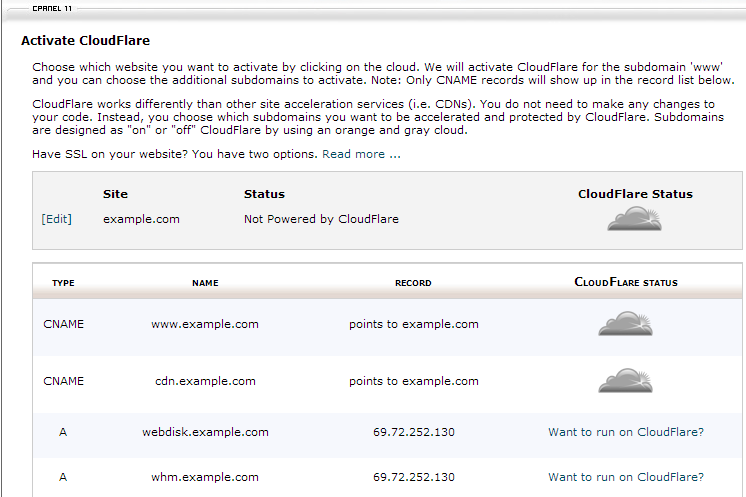
Once your account has been created, you will see a page like below.
Now simply click on the gray cloud icon ![]() next to the cdn.example.com entry to enable CloudFlare for that subdomain. Once it has been activated, the icon will turn orange
next to the cdn.example.com entry to enable CloudFlare for that subdomain. Once it has been activated, the icon will turn orange ![]() .
.
The CloudFlare CDN and optimization service is now activated for your domain and will start resolving within a few hours.
Use the CDN in your application
Now that the CDN is created and ready to use, it is time to configure your web application to make use of it. Exactly how to do this varies between the different web applications and frameworks, but if you are using a CMS or similar script, there should be an option to specify the URL for static content. If you are developing your own website, you can simply point all image files, CSS, Javascript and other static files to the CDN url.
How to use CDN in a Magento store
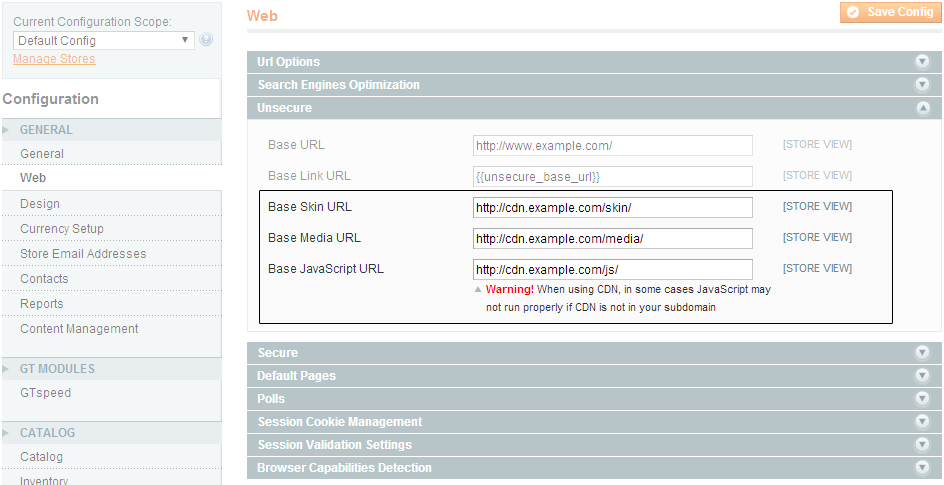
If you are using Magento, you can easily enable the CDN following these steps:
- Log in to your Magento Admin Panel;
- Click on System -> Configuration -> Web;
- Enter your CDN URL for the Base Skin URL, Base Media URL and Base JavaScript URL;
- Clear the cache for the changes to take effect.
