10 Steps to Make Magento 2 Faster

Magento 2 (M2) is a complex eCommerce platform. It is highly configurable and can be customized to meet any business logic you can think of, but that comes with a price: without the proper tuning Magento 2 can be terribly slow.

In this article, Konstantin Gerasimov, a Magento Certified Developer, shares his Top 10 field proven tips to fix Magento 2 speed problems and boost Magento 2 performance.

1. Add more CPU and RAM

The number one reason for slow Magento 2 is poor hosting. Magento 2's modular architecture and database intensive backend will require more from your hosting environment than a regular website. You simply can't expect Magento 2 to run well on a cheap, shared hosting plan - especially not when your traffic is starting to increase. Your pages will load slowly and eventually you will run into resource limits that forces you to upgrade your server, resulting in poor customer experience and low conversion rates.

For the best performance I recommend a cloud or dedicated server, but if you are just starting out or is on a strict budget you can get a fast Magento 2 store even on a shared plan as long as it is specifically optimized for Magento 2 by a hosting company such as ProperHost.

When you start to get a decent amount of traffic you may consider splitting the web (http) and database load between two separate servers. Magento 2 can easily be configured to use a separate server for the database - just edit app/etc/env.xml and set the DB host accordingly:

array (
  'table_prefix' => '',
  'connection' => 
  array (
  'default' => 
    array (
      'host' => '<add DB hostname/IP>',
      'dbname' => '<dbname>',
      'username' => '<dbuser>',
      'password' => '<dbpass>',
      'active' => '1',
    ),
  ),
),

2. Custom extensions audit

I once talked with a store owner who had 140 (!) 3rd party plugins installed on his Magento 2 site. No wonder he complained about slow checkout, low conversion rate and poor performance.

The lower the number of extensions you install the better. The problem here is with extension coders. While Magento 2 core was programmed by experts, custom plugins are often created by average programmers with mediocre skills and no appreciation for performance benchmarks.

Here is what you need to do: disable extensions one by one and see if it makes a difference in terms of site speed. Once you identify a bad extension contact its vendor and ask for a patch or find an alternative plugin.

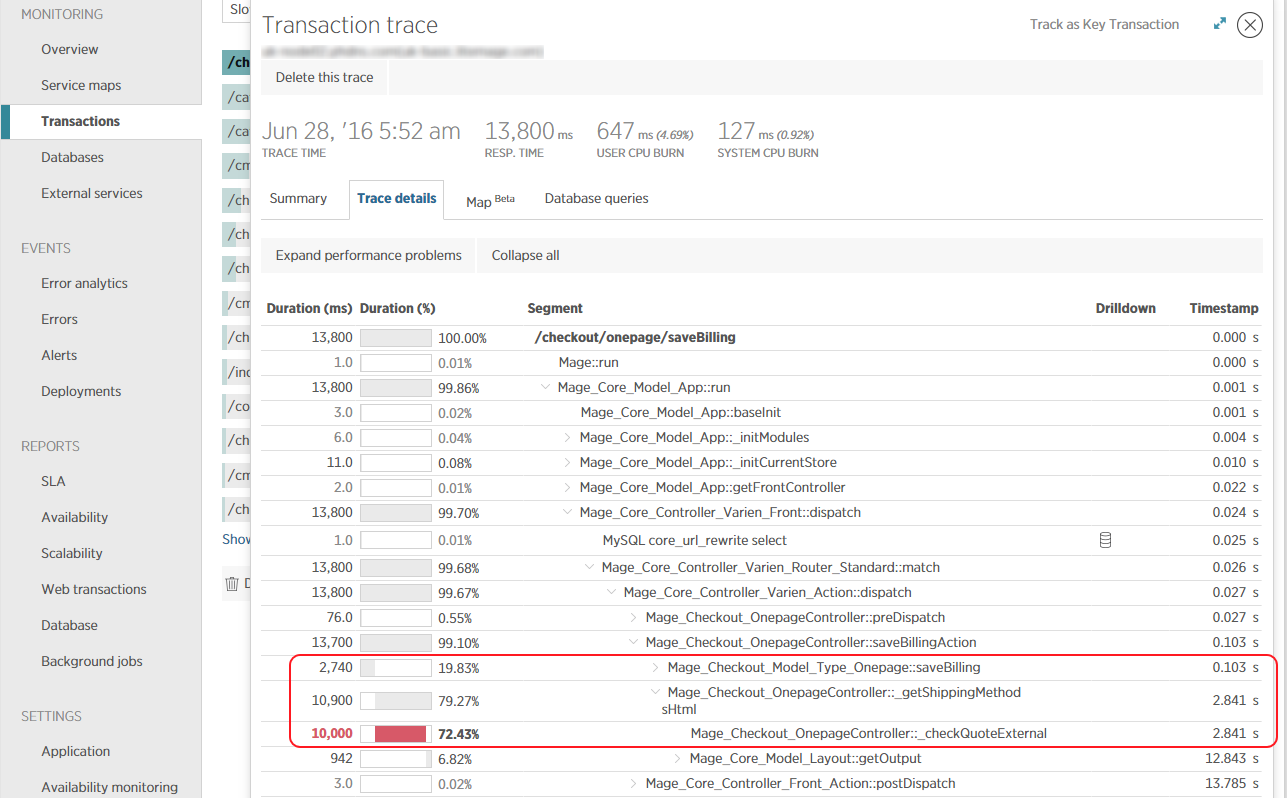
3. Time to first byte audit

Time to first byte (TTFB) is how long it takes for Magento to generate page HTML. The lower the better. A fresh install of Magento 2 has a TTFB for uncached pages around 0.5s. To perform time to first byte audit enable profiler. Put this line in index.php and pub/index.php (at the beginning of the file):

$_SERVER['MAGE_PROFILER'] = 'html';

Then reload any frontend or backend page and at the bottom you will see the profiler trace like this one:

Magento 2 profiler trace

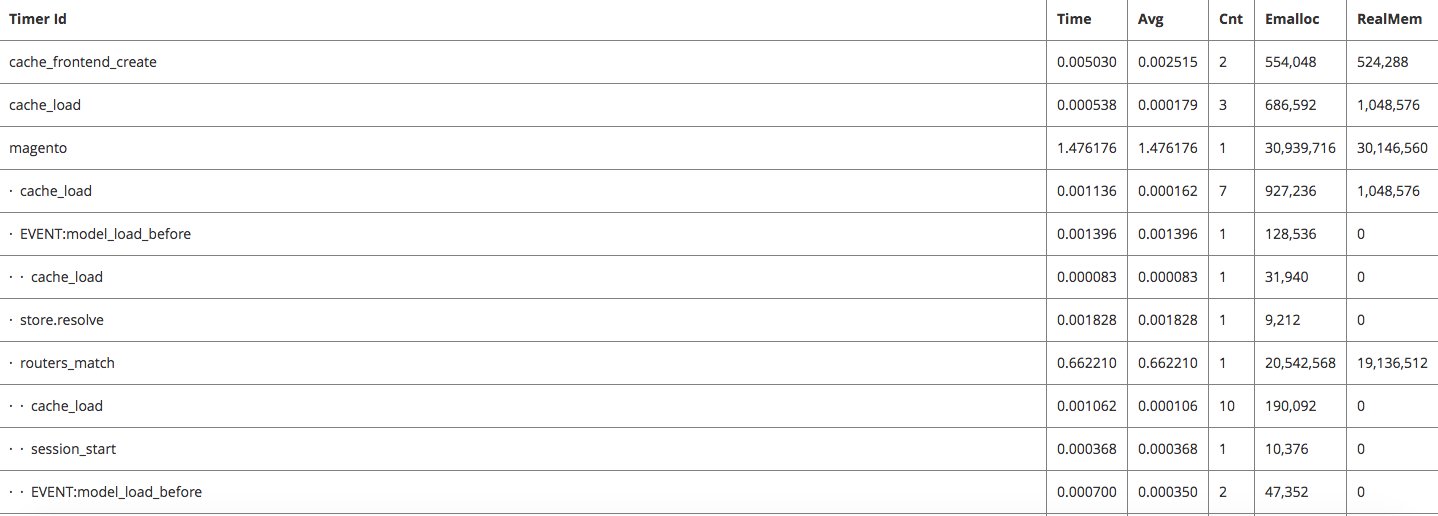
Study the trace and see what function calls or template .phtml files take most time. Analyze those code blocks and see if you can optimize them. Another alternative is to use a PHP profiler like xhprof. You might need help from a system administrator to install and set it up.

4. Enable Production Mode

Magento 2 can run in three different modes: default, developer and production. Production mode is the fastest one. It improves performance because static files are pre-generated in advance.

To see what mode you are in now run this command:

php bin/magento deploy:mode:show

To activate Magento 2 production mode, run this command:

php bin/magento deploy:mode:set production

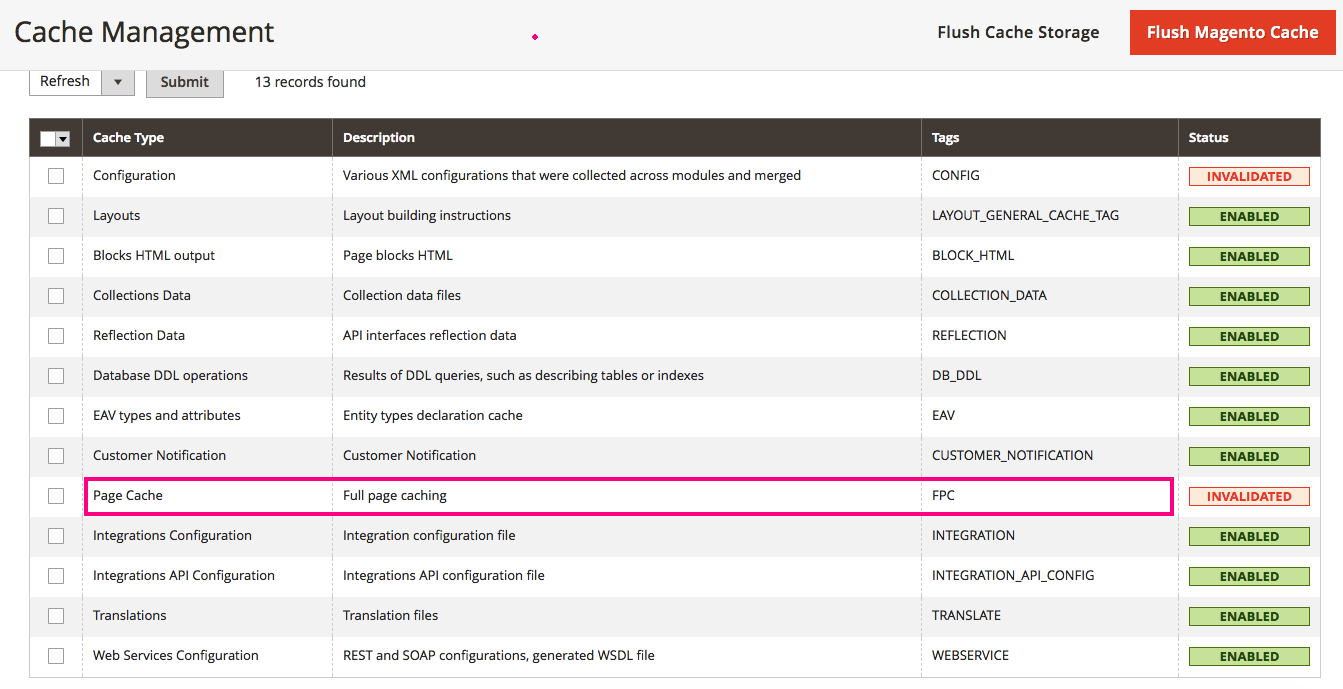
5. Enable Full Page Cache

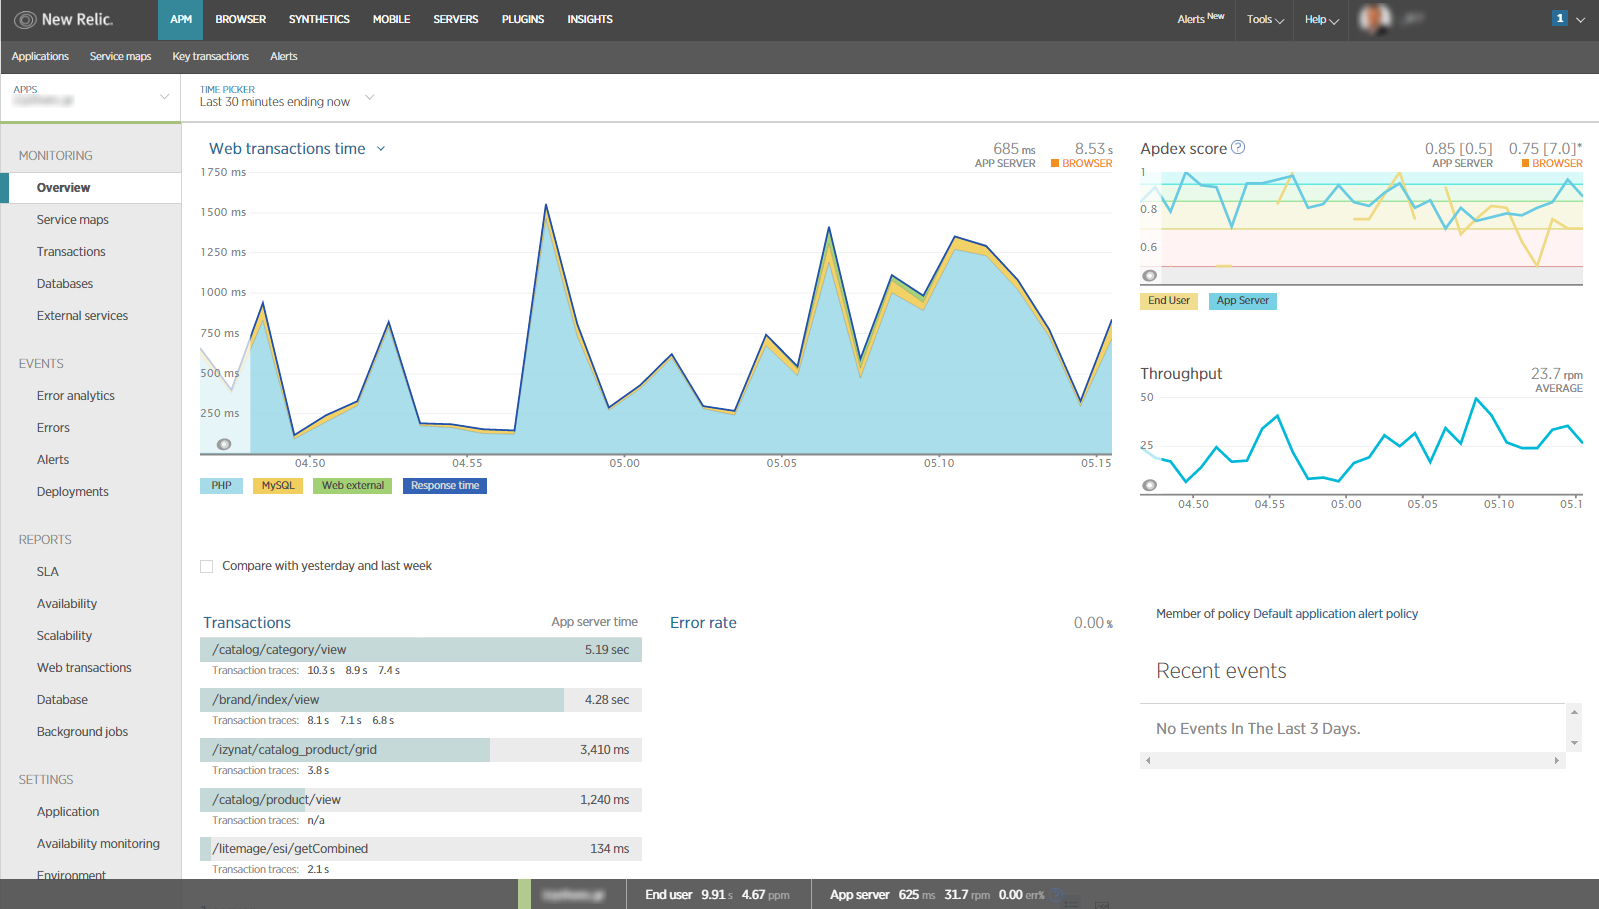
Unlike Magento 1.x, Magento 2 comes with a built-in Full Page Cache (FPC) which pregenerate pages so the server does not have to run expensive queries on each request. To make sure FPC is turned on, go to backend System > Cache Management and make sure that Page Cache is enabled. This is a small fix that can have great impact on your page speed.

Magento 2 full page cache

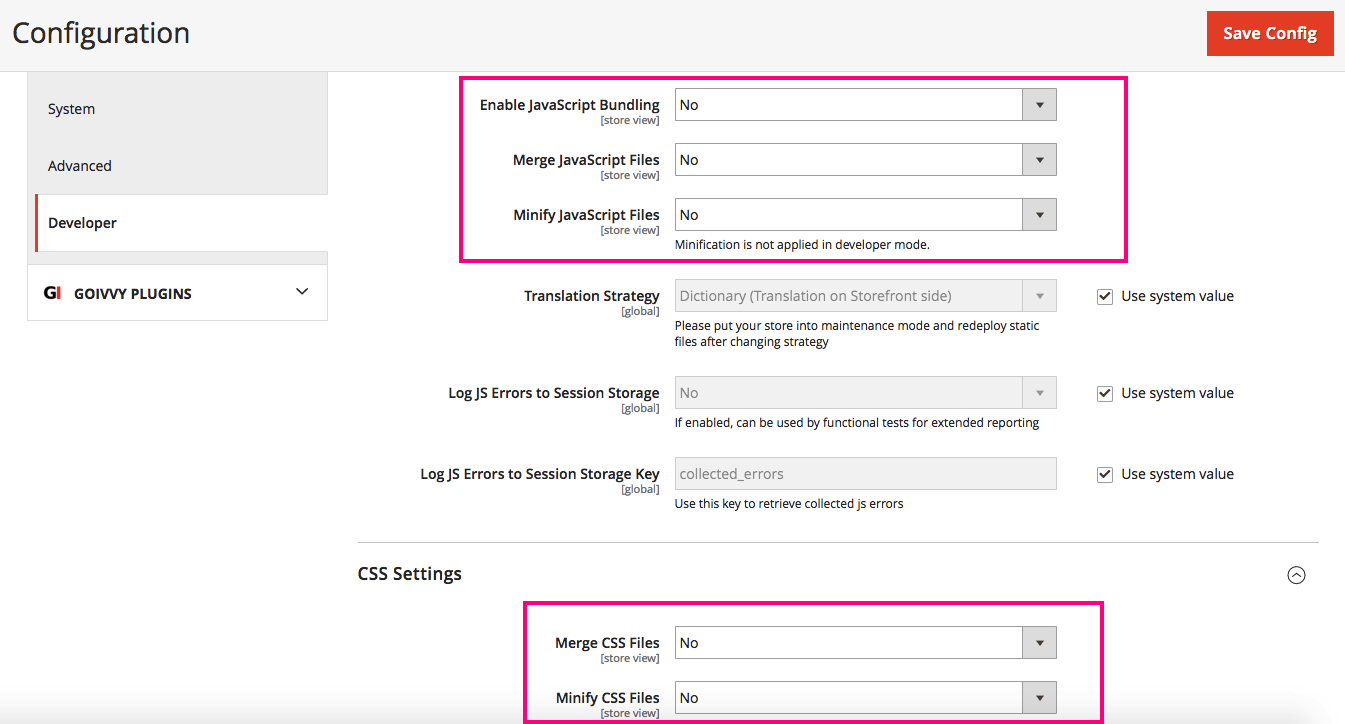
6. JS/CSS merge, bundle and minification

Magento 2 can merge, bundle and minify CSS and JavaScript files. This can improve page rendering speed and overall performance, but beware that bundling can result in quite large files beeing downloaded with each page so there is a tradeoff. One note: minification only works in Production Mode.

Merge/minify CSS and Javascript

7. Google PageSpeed server extension

Google has released a server extension that can greatly improve site speed. It optimizes images, compresses HTML, defers loading of JavaScript and much more. It is called PageSpeed Module. You can use precompiled binary for Nginx or Apache, or compile your own version from source. Note: administrator access is usually required in order to enable this module.

Configuration is simple. For example if you are using Nginx add these 4 lines to the server directive:

pagespeed on;
pagespeed FileCachePath /var/cache/pagespeed;
pagespeed RewriteLevel CoreFilters;
pagespeed EnableFilters defer_javascript,prioritize_critical_css,extend_cache;

The extension can significantly improve a site's PageSpeed Score. The plugin however doesn’t improve time to first byte (TTFB) and in some cases can slightly increase it.

8. Use PHP7

The easiest speed boost you can get from upgrading to PHP7. PHP7 offers major performance improvements over PHP 5.6, and many users have reported >30% faster page loads just by upgrading to PHP7 alone. Luckily Magento 2 supports PHP 7 out of the box.

To find out which version of PHP your site is running, create a file phpinfo.php with this code:

<?php echo phpinfo() ?>

Load up the page in a browser and it will tell you which PHP version you are running (as well as other useful information about your server environment).

9. Enable Varnish Cache

If your hosting environment supports it, another way to gain more speed is to use Varnish Cache. Varnish is a web application accelerator also known as a caching HTTP reverse proxy. You install it in front of any server that speaks HTTP and configure it to cache the contents. It does require sysadmin knowledge to install and operate so it may not be suitable for everyone. Also, the real benefits of Varnish only comes into to play when you start to have a large number of concurrent visitors.

Magento 2 has built in support for using Varnish as the backend storage for the Full Page Cache. To enable it go to Stores > Configuration > Advanced > System > Full Page Cache and set Caching Application to "Varnish Cache". Then you can click on Export Configuration to get a pre-generated VCL file for the version of Varnish you are using. Note that the Varnish Cache server must be installed and configured separately for it to work.

10. Install LiteSpeed LiteMage Cache

The last tip is to install LiteSpeed LiteMage Cache for Magento 2. LiteMage is a alternative to the PageCache module and Varnish Cache powered by the LiteSpeed Cache technology. For most use cases, LiteMage Cache can improve your stores' performance right out of the box. LiteMage Cache also reduces the complexity of your stack; only the LiteMage Extension and LiteSpeed Web Server are required. There is no need for an NGINX reverse proxy nor a Varnish Cache instance because the server can handle HTTPS and HTTP/2 requests and cache the pages all in one application.

If you are already running LiteSpeed Web Server Enterprise Edition for your web server or uses a hosting provider that offers it (such as ProperHost), you can follow these steps to install the extension on your Magento 2 store.

About the author

Konstantin Gerasimov is a Magento Certified Developer at Goivvy.com. He specializes in Magento speed optimization, backend customization and extension creation.

Black Friday Deals Are Here! Save BIG!

The biggest sale of the year has arrived! For Black Friday 2016 we made it simple: take 50% off the first month on ANY hosting product with coupon code blackfriday16. Use this link to go directly to the order form. The promotion applies to shared hosting, dedicated servers and cloud servers. The promotion runs from today until Monday, November 28th 2016.

Terms:
The promo price applies to the first monthly invoice only. After the first month of service the price returns to normal.

Black Friday 2016

Critical Security and Functional Updates Released for Magento 1.x and 2.x

The Magento team have released critical security updates to Magento 1.x and 2.x, affecting both the Community and Enterprise Edition. All store owners are recommended to upgrade their stores immediately to the latest version.

ENTERPRISE EDITION 1.14.3, COMMUNITY EDITION 1.9.3, AND SUPEE-8788

Enterprise Edition 1.14.3 and Community Edition 1.9.3 deliver over 120 quality improvements, as well as support for PHP 5.6. They also resolve critical security issues, including:

  • Remote code execution vulnerabilities with certain payment methods
  • Possibility of SQL injections due to Zend Framework library vulnerabilities
  • Cross-site scripting (XSS) risks with the Enterprise Edition private sale invitation feature
  • Improper session invalidation when an Admin user logs out
  • The ability for unauthorized users to back up Magento files or databases

The SUPEE-8788 patch addresses these security issues in earlier Magento versions. Please note that the SUPEE-8788 patches for Community Edition 1.8 and earlier releases and Enterprise Edition 1.13 and earlier releases fail if a store has previously applied SUPEE-1533 or SUPEE-3941 security patches. The Magento team is working to correct this issue and will provide new patches in the next one to three days. Until then, these versions of the SUPEE-8788 patch are removed from distribution.

Functional update details and installation instructions are available in the Enterprise Edition and Community Edition  release notes; a full list of security updates is published in the Magento Security Center.

ENTERPRISE EDITION AND COMMUNITY EDITION 2.0.10 AND 2.1.2

Updates to Magento 2 software address the same critical security issues described above. Additionally, the releases make several functional improvements and API enhancements. New API methods allow 3rd party solutions, such as shipping or ERP applications, to use APIs to transition anorder state when they create an invoice or shipment. Magento 2.1.2 now also includes PHP 7.0.4 support and Magento 2.0.10 and 2.1.2 are compatible with MySQL 5.7. A summary of improvements is available in the release notes; all security updates are listed in the Security Center.

You are advised to deploy these new releases right away. Updates should be installed and tested in a development environment before being put into production. Always take a full backup before attempting to upgrade your store.

All users are also encouraged to regularly check that their store is in accordance with the Magento Security Best Practices.

Using New Relic to Troubleshoot Magento Performance Problems

We are pleased to announce that New Relic Application Performance Monitoring (APM) is now available on our hosting platform! New Relic is already installed on our shared hosting servers and can be installed on our dedicated servers/cloud servers upon request.

New Relic is an application performance and monitoring suite that makes it easy to diagnose and debug performance issues on your website. With New Relic you get valuable insight into your website health. Real-time web transaction times and historical data makes it easy to monitor how your website performs, allowing you to take actions quickly if a problem arise. You can even set up alerts to notify you immediately at certain thresholds.

Some of the features you get with New Relic:

  • Web transactions time: with a quick glance see how well your website performs. New Relic not only monitors home page load time, but all areas of your website including critical functions such as a checkout process or email opt-in form.
  • Transaction throughput: is your server able to keep up with the traffic? Watch your throughput carefully and upgrade before it becomes a problem.
  • Slow MySQL queries: not only will New Relic give you the page response time. It will also show you exactly how much time is spent waiting for a SQL query to finish or waiting for an external web service to respond. This information is invaluable when it comes to optimizing your Magento codebase.
  • Application code profiling: use New Relic to drill down into specific code segments or SQL queries to identify issues that normally are very difficult to find. New Relic will pinpoint the exact line of code that is causing you headache.
  • Key transactions: Flag your most critical transactions to quickly spot when things like response times, call counts, or error rates perform poorly. For a Magento site this would typically be the Add to Cart function or checkout.
  • Apdex user satisfaction scoring: a simplified SLA solution, Apdex measures the ratio of satisfactory response times to unsatisfactory response times and provides a score that gives you better insight into how satisfied users are.

In this blog post we will show of how we can use New Relic to identify and fix a performance problem within a Magento ecommerce site, and also how it can be used to track the performance of your website over time by the help of key transactions tracking. Some of the features mentioned in this article requires New Relic Pro edition. New Relic is available at different subscription levels. To get started, you can sign up for a 14-day trial.

Enable New Relic integration

The first step we need to do is to instruct our website to report data to New Relic. If you are on a ProperHost Magento hosting server we already have the New Relic PHP extension installed, so all you need to do is activate it in .htaccess:

php_value newrelic.enabled yes
php_value newrelic.license "INSERT_YOUR_LICENSE_HERE"
php_value newrelic.appname "INSERT_APP_NAME"

You can find the license key from your New Relic control panel (APM > New PHP Application > Reveal License Key or under Account Settings).

The app name is an arbitrary label which is used to identify the site within the APM interface if you host multiple websites.

After adding the above, New Relic should start collecting metrics and data will show up in your account after a few minutes.

Finding the performance bottleneck

Scenario: customers of our fictitious Magento store have recently reported problems of slow loading pages and not being able to complete their orders. We have also noticed an increase in abandoned carts from our analytics data. For an ecommerce site it is crucial that the checkout process works flawlessly so we turn to New Relic to diagnose the problem. In a complex system such as Magento, finding the piece of code that is responsible for the performance problem can be a challenging task even for an experienced developer, but fortunately New Relic makes it really simple!

We use the APM (Application Performance Monitoring) feature in New Relic to monitor the response time of our web site. The main overview gives you a few key metrics about how well your application is performing, such as the average page load time, application server response time and application throughput.

Click on the application name to show more detailed performance statistics for this application. We are interested in the poorly performing transactions, so we click on Transactions and sort the list by "Slowest average response time". In terms of web applications, a transaction can be thought of as a single request that is processed on the server. New Relic can monitor other type of transactions as well, such as database queries or external web service calls, but in the scope of this tutorial we focus only on web transactions.

We can see that the transaction /checkout/onepage/saveBilling takes on average more than 13 seconds to complete. This is seriously affecting the customer experience and we need to fix this as soon as possible to avoid losing more sales. Below the Transaction traces you will find the recent transactions matching this url and how long it took to process the request.

Next we click on the link "/checkout/onepage/saveBilling" to bring up the Transaction Trace for that url. As we see almost all of the time is spent in the Mage_Checkout_OnepageController::_checkQuoteExternal component. Now click on Trace Details to reveal the complete call tree. We can see that the function _checkQuoteExternal is called from the _getShippingMethodsHtml function in the OnepageController each time the saveBilling action is invoked. This is causing our checkout page to perform poorly.

As a developer we can now inspect the OnepageController, which is located in the file ./app/code/core/Mage/Checkout/controllers/OnepageController.php. The relevant code segment is highlighted below:

protected function _getShippingMethodsHtml() {
	$this->_checkQuoteExternal();
	$layout = $this->getLayout();
	$update = $layout->getUpdate();
	$update->load('checkout_onepage_shippingmethod');
	$layout->generateXml();
	$layout->generateBlocks();
	$output = $layout->getOutput();
	return $output;
}

private function _checkQuoteExternal() {
	sleep(10);
}

As you can see from the above we have added a sleep function inside the code to simulate a performance bottleneck. In a real-world scenario this could for example have been a remote call to a shipping provider or a slow SQL query responsible for the delay.

Tracking key transactions

In web applications, some web transactions are more important to the business than others, and should be monitored with precision. They include key business events in your application (such as sign ups or purchase confirmation) and/or transactions that are particularly important from a performance perspective (such as search or login).

In New Relic, Key Transactions let you closely monitor these important key business transactions and receive alerts when they are performing poorly.

As store owners we obviously want to make sure customers are able to add products to their cart and complete their purchases, so we identify the following two key transactions:

/checkout/cart/add
/checkout/onepage/saveOrder

Let's go ahead and track these in New Relic. From the APM tab, we click on Transactions and select the above transactions one by one, then click on Track as key transaction in the right pane.

These transactions can now be monitored from the Key transactions menu in the top bar. From this section one can also edit the alert policy to automatically be notified via email or phone if certain conditions are met, such as a dissatisfying Apdex score or an increasing server error rate. This way you become aware of any issues before your users notice them.

New Relic Reporting from Magento

For an even deeper integration between Magento and New Relic you can enable New Relic reporting in Magento, and have your store send data and events back to New Relic. For example, the Deployments feature in New Relic is useful to reveal what impact certain code changes (a deployment) have on yoursite's performance. You'll quickly see whether the deployment had a positive or negative impact on Apdex, response time, throughput, or errors.

You can also use New Relic Insights to analyze and visualize data in real-time, helping your team make faster and better decisions.


Magento 2 has built-in support for New Relic Reporting so it is only a matter of enabling it in Stores > Configuration > New Relic Reporting. For Magento 1.x a number of extensions are available that provide similar functionality.

Conclusion

In this article we have shown how New Relic can be used to monitor website performance and gain useful insight into your web sites’ health. For developers, New Relic is an invaluable tool that helps to debug application code and pinpoint the root cause of performance problems, even in a production environment. For more information, visit newrelic.com and sign up for a free 14-day trial now.

How to Upgrade Magento 2 CE using System Upgrade

In this tutorial we will go through the steps necessary to upgrade a Magento Community Edition (CE) 2.x installation using the web-based updater application. At the time of writing, the latest stable version is Magento CE 2.1, but the same steps should apply to future versions as well.

Prerequisites

Starting with the 2.1 release, Magento is no longer supporting PHP 5.5, making PHP 5.6 the new minimum requirement. This is a welcome change as PHP 5.5 will reach End-of-Life (EOL) in July 2016, but it may cause problems for some users as not every hosting provider has made the leap to PHP 5.6 yet.

Magento 2.1 supports both PHP 5.6 and PHP 7, and ProperHost users can freely choose between the two versions. In this tutorial we will use PHP 7, which offers the best performance and latest features. We also assume that Magento is installed in the top-level directory (root) of your account, i.e. /home/<username>/public_html where <username> is your cPanel account username. If you have installed Magento in a sub-directory or add-on domain folder, you need to adjust the paths in the commands accordingly.

Step 0: Backup, backup, backup!

Before you do anything, make sure to create a full backup of your files and database. You can use the cPanel Backup Wizard or create the backup using SSH. We do not recommend that you use the built-in backup functionality in Magento as it can be unreliable.

Step 1: Set PHP 7 as the default for your installation

Create an .htaccess file in your home directory (e.g. /home/youruser/.htaccess) with the following content:

AddType application/x-httpd-php7 .php

This will ensure all .php files in your account is processed by PHP 7. If you want to use PHP 5.6 instead, simply replace php7 with php56 in the line above.

Note: it is important that you save this .htaccess file in your home directory, or a parent directory to your Magento installation. If you add it to your Magento .htaccess it will be overwritten by the Magento upgrader and it will revert to the server default PHP version which may differ from the one you prefer.

Step 2: Configure the cron jobs

Many of the admin backend tasks as well as the upgrade system requires that the Magento 2 cron jobs are configured properly. 

Log in to your cPanel and click on Cron Jobs in the Advanced section. Add three cron job commands and configure them to run Once Per Minute:

php7 -f /home/<username>/public_html/bin/magento cron:run | grep -v "Ran jobs by schedule" >> /home/<username>/public_html/var/log/magento.cron.log
php7 -f /home/<username>/public_html/update/cron.php >> /home/<username>/public_html/var/log/update.cron.log
php7 -f /home/<username>/public_html/bin/magento setup:cron:run >> /home/<username>/public_html/var/log/setup.cron.log

Replace <username> with your cPanel account username. Again, if you prefer to use PHP 5.6 you can replace php7 with php56 in the above commands. When the cron jobs are configured correctly it should look like this:

Step 3: Edit composer.json (Sample Data only)

If you do not have the sample data installed you can skip this step.

Depending on which version of the sample data you have installed previously, you might have to manually correct the component dependencies. If the readiness check fails at “Check Component Dependencies”, open the file composer.json in your installation root directory and change the required version from "100.0.*" to "100.1.*" for each of the sample data modules (see below).

Save the file and continue to Step 4.

Step 4: Set up Marketplace Authentication Keys

In order to use the Magento 2 System Upgrade and Component Manager you first need to set up Magento Marketplace authentication. Create an account and log in to Magento Marketplace, then go to Marketplace > My Access Keys.

From there you can generate a new pair of authentication tokens to use to Install, update, or upgrade third-party components; and upgrade the Magento software using the Component Manager and System Upgrade utilities.

Once you have your public and private keys, log in to your Magento Admin Panel and go to System > Web Setup Wizard > System Configuration. Enter your public and private access keys and click on Save.

Step 5: System Upgrade Wizard

You are now ready to start the upgrade process.

Reminder: have you created a full backup of your account? If not, go back to Step 0 and create a backup first.

From your Magento Admin Panel, go to System > Web Setup Wizard > System Upgrade. Select "Version 2.1.0 CE (latest)" in the Magento Core Components dropdown, and choose "Yes" to upgrade Other Components (such as sample data). If you are upgrading the sample data, make sure that you select the latest version as well (100.1.0), then click on Next.

Magento will now perform a readiness check to ensure that your server fulfills all the requirements to complete the upgrade. When the check has completed, click on Next to continue.

Next, you will now be given the options to have Magento backup your files and database. In our example we use an alternative method (see Step 0: Backup) to perform the backup so we remove the checkboxes and skip this step.

Finally, review your selection and click on Upgrade. Pay special attention to the version numbers to make sure you are upgrading to the correct target version.

Now it is time to sit back and have a cup of coffee while you wait for the upgrade to finish. If any errors occur during the process they will be displayed in the console log.

If everything goes well, you should see a success message after a couple of minutes.

Step 6: Flush Magento Cache

The upgrader application should do this automatically for you, but it is always a good habit to flush cache after any significant changes has been made to your store. Go back to the admin panel, System -> Cache Management and click on Flush Magento Cache. Alternatively you can empty the caches via SSH:

rm -rf var/cache/* var/generation/* var/page_cache/*

That's it! Your Magento 2 store should now be running the latest version.

Bonus Step: Enable production mode and deploy static content (optional)

Before you launch your Magento 2 site you should always switch to production mode for better performance. If you are still developing your site you can skip this step.

After you have changed to production mode you also need to deploy static view files as they will no longer be generated on-the-fly. Below are the commands to change Magento mode and deploy static files using the Magento CLI utility:

php7 bin/magento deploy:mode:set production
php7 bin/magento setup:static-content:deploy

This will take a while so please be patient!